
Description:
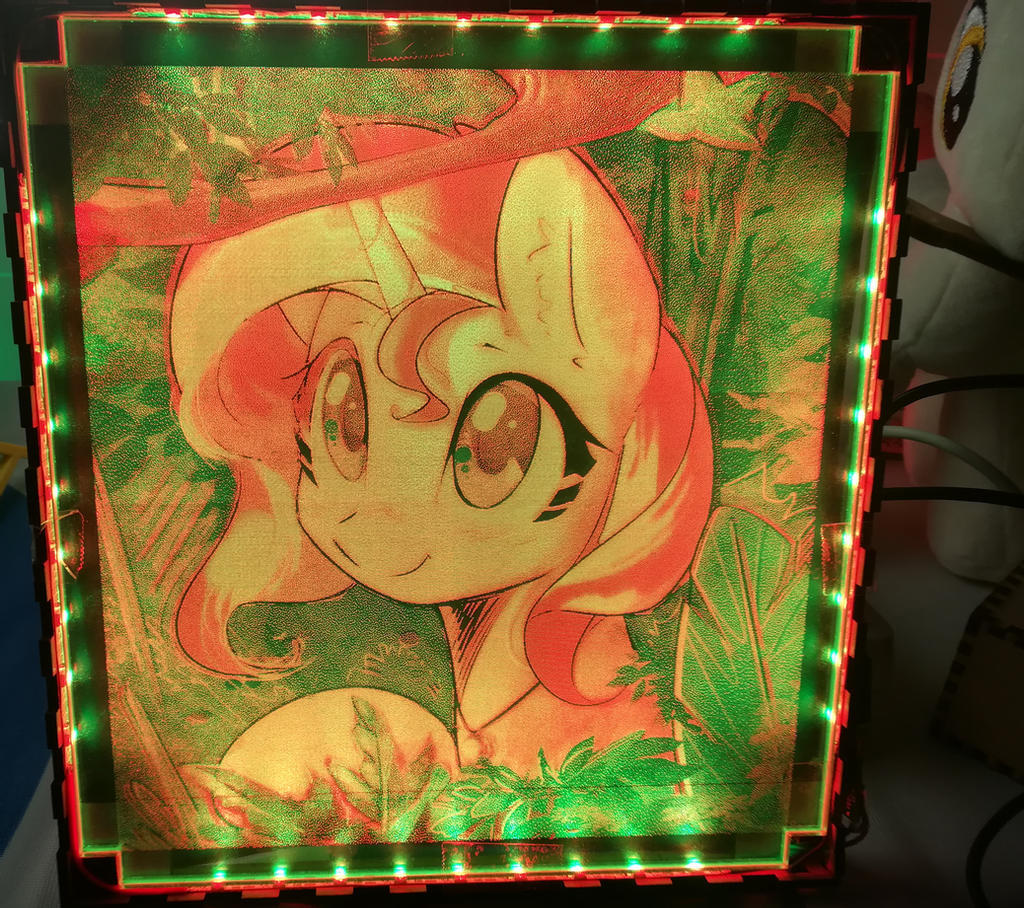
I would like to present to you a second picture of Jungle Sunset project.
The idea behind the project
This was my next step in the development of my multicolored acrylights. Previously I have successfully tested the concept with the project Daring Do: Engraving. This time I tried to test 2 design changes.
Firstly, I wanted to upscale the area of the acrylight but without sacrificing a nearly equal lit surface. The problem is, that the light density, of the engraved dots, decreases in coalition to the distance to the LEDs. This is can be often seen in only bottom-lit acrylights (The bottom is much brighter than the top). My solution was to illuminate all sides. That is the reason for the way it looks like a picture frame. I furthermore tried to reduce the light overlap in the corners by only not putting LEDs in such places.
Secondly, I wanted to blend the 3 produced colors (red, green, yellow) into all possible colors which do not contain blue light. For this, I needed for this purpose a mlp picture which consists dominantly these colors. After a long search, I finally found the amazing picture I reach as far as I can see by mirroredsea. It not only contained all my requirements but it also features sunset shimmer (one of my most favorite ponies). After I saw it for the first time I instantly knew that I will create an engraving of it.
How the lighting works
The multicolored acrylight consists of two inside-facing acrylic engravings. One is green edge-lit light and one red edge-lit. The colored light is created on the respective engravings. Yellow is the addition of red and green light. This means that both sides are sinuously engraved. The engraving consists furthermore of a lot of very tiny dots. This creates the illusion of nearly all mixed colors with red, green, and yellow.
Some facts about the project
project time: 10 h
engraving time: 100 min (both sheets)
laser cutting time: 12 min (the frame)
engraving size: 200 x 184 mm
frame size: 225 x 240 x 22 mm
led count: 72 (9 red and 9 green per site)
Source, main and extra pictures
I reach as far as I can see by mirroredsea
Jungle Sunset (main picture)
Light Off
Wiring
I got permission for the uploaded by the original picture designer mirroredsea
Comments
0 comments posted